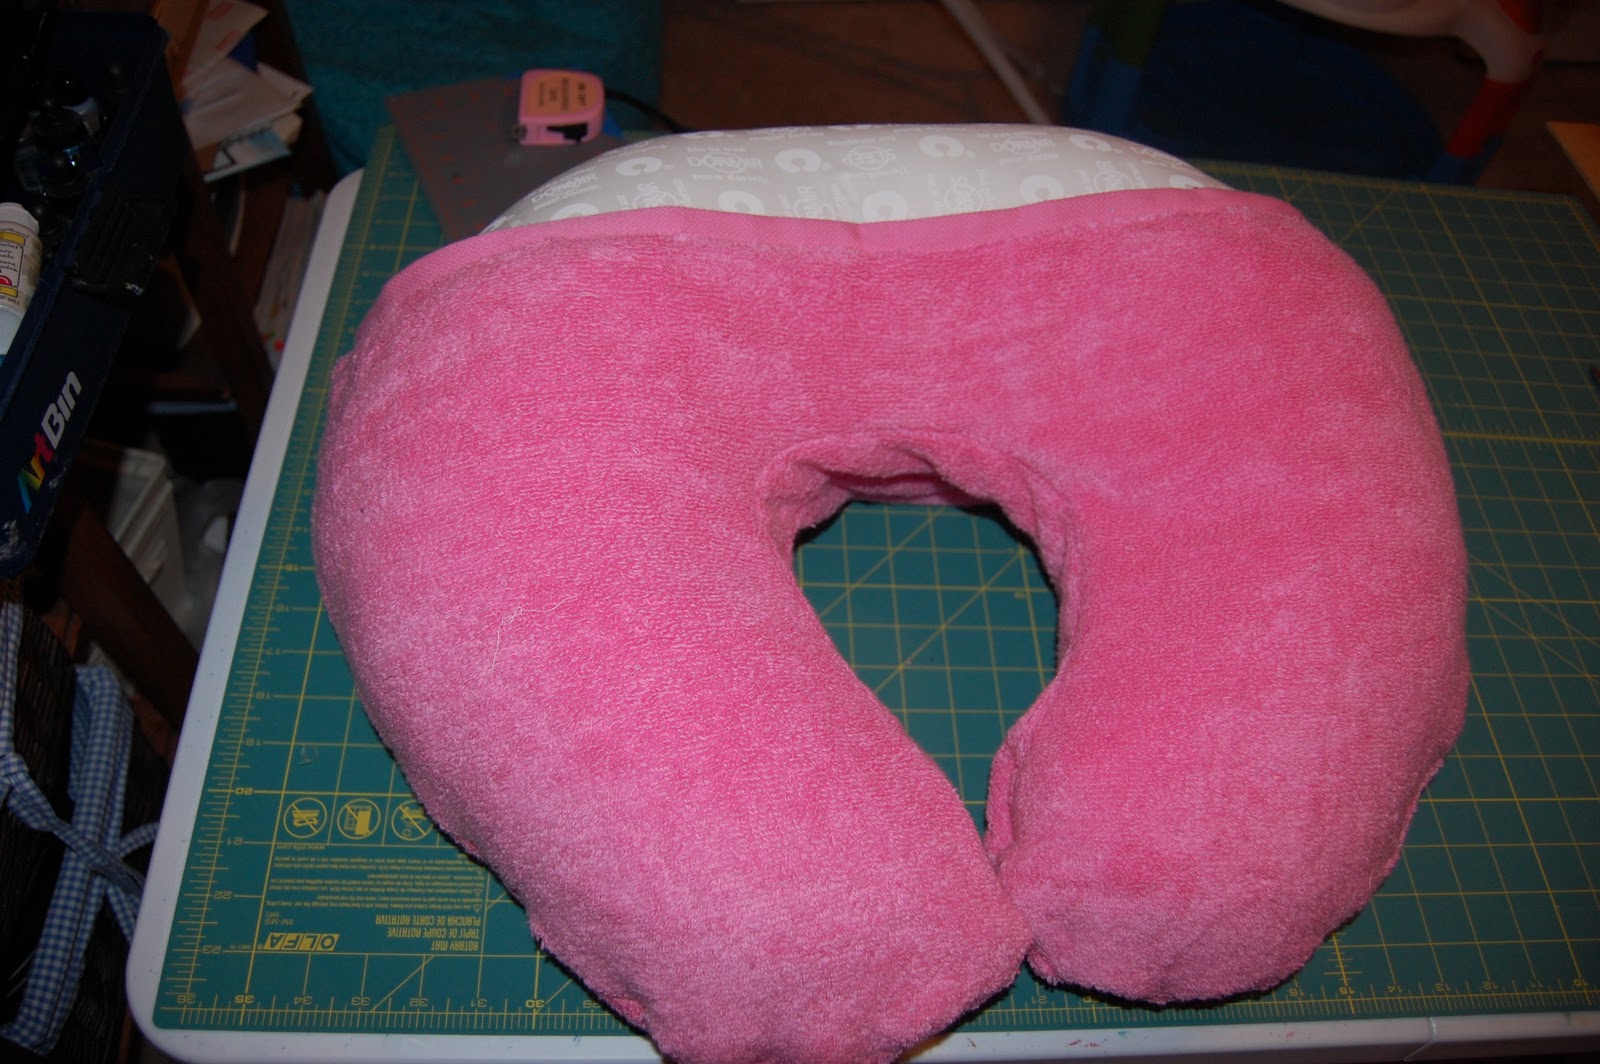
I know... I haven't posted in FOR-EVER. But I found an awesome contest to enter, and need a place to "host" my entry :-P. The contest is the Borderline Brilliant Contest over at Prudent Baby
Enter: Annabelle's hand-print!! I traced her hand as best you can a wiggly infant's hand, and did a running stitch as my "border". The 11/17/11 is her birthday :-D
Wish me luck!!
September 15, 2012
June 28, 2012
Fourth of July!
I was at CVS today, hungry, and shopping, and this made it into my cart... Wouldn't it be cute in a bowl with some pretzel logs for the Fourth of July?!?
That's my contribution to society this week ;) enjoy!
May 15, 2012
TMI.
I have a few friends (and family!) that are new mommies like myself, and I just e-mailed one with another bit of my off-the-wall-advice. That stuff that NO ONE tells you ahead of time? And that seems crazy even to a crazed new mom? Yea... I'm all about sharing that kind of stuff... because it's stuff you really need to know. Even if it's a little scary.
Like: when your milk doesn't want to wait for the baby (specifically at night)? And the Lansinoh pads aren't cutting it (btw... don't bother with any other ones... Target's brand is a close second, but still not as good)... maxi pads. You might feel funny... it might seem awkward... but it's SO much better than waking up in a puddle. Oh... and get a waterproof cover for your mattress. So much easier to throw that in the wash than try and get stink out of a mattress. (and no, I didn't actually get to use the maxi pads, but the amount of wash I could have saved if I'd thought of it sooner would have been awesome. And oddly, in random conversation the other day... I met someone who did. Go her!)
Told you. TMI.
Like: when your milk doesn't want to wait for the baby (specifically at night)? And the Lansinoh pads aren't cutting it (btw... don't bother with any other ones... Target's brand is a close second, but still not as good)... maxi pads. You might feel funny... it might seem awkward... but it's SO much better than waking up in a puddle. Oh... and get a waterproof cover for your mattress. So much easier to throw that in the wash than try and get stink out of a mattress. (and no, I didn't actually get to use the maxi pads, but the amount of wash I could have saved if I'd thought of it sooner would have been awesome. And oddly, in random conversation the other day... I met someone who did. Go her!)
Told you. TMI.
May 14, 2012
Poop.
Ever have just one of those days? The ones where you have mighty plans, and then your little one poops in the car seat... all over her cute, white, onesie... And all up in her adorable little jeggings... And you only discover this after your current plans for the day have been canceled... And you're suddenly glad that you turned the car around instead of keeping on going?
I'm having one of those days. Blogging on my iPhone while I watch Bean in her tub... Soaking the poop off.
Her clothes and car seat are soaking in the wash machine downstairs, in a mixture of washing detergent and LA's Totally Awesome. It's day two of this mixture, although yesterday it was different clothes...
Personally, I like LA's Totally Awesome for poop stains (and any other stains for that matter), but I usually use it as a topical stain fighter and scrub it in with an old toothbrush. The jury is still out on how well it works just poured in the wash water. Anyone out there find a good wash additive for poop stains? Anyone who's read this post long enough to get to this point wants to know too!!
I'm having one of those days. Blogging on my iPhone while I watch Bean in her tub... Soaking the poop off.
Her clothes and car seat are soaking in the wash machine downstairs, in a mixture of washing detergent and LA's Totally Awesome. It's day two of this mixture, although yesterday it was different clothes...
Personally, I like LA's Totally Awesome for poop stains (and any other stains for that matter), but I usually use it as a topical stain fighter and scrub it in with an old toothbrush. The jury is still out on how well it works just poured in the wash water. Anyone out there find a good wash additive for poop stains? Anyone who's read this post long enough to get to this point wants to know too!!
May 12, 2012
Mom Tips
ALDI's is AWESOME for new moms. The basics, 4 aisles, cheap prices, easy in... easy out. Why did I learn this TODAY... a week before Bean turns 6 months!?!?
Diaper Pails are a load of Hooey. Expensive bags, crazy contraptions... still stink. Just get yourself a nice small foot pedal regular garbage can and a box of baking soda to sprinkle on top. Use the grocery bags from the store that seem to multiply anyway and empty it often. Personally, I like Simple Human's Profile Step Can.
-Betsy
Diaper Pails are a load of Hooey. Expensive bags, crazy contraptions... still stink. Just get yourself a nice small foot pedal regular garbage can and a box of baking soda to sprinkle on top. Use the grocery bags from the store that seem to multiply anyway and empty it often. Personally, I like Simple Human's Profile Step Can.
-Betsy
changing the scope of the blog... AGAIN
Just a Little Something Betsy has been photos, food, crafting, fashion, all sorts of things. So adding to the mix (and probably focusing on it for a while) will be random thoughts. Things that would probably be appropriate for Facebook, but that I want to save a little better than that... that I'd like to be able to search through and remember later to pass on. So... less photos... more random thoughts... still Just a Little Something Betsy :-P
-Betsy
-Betsy
January 31, 2012
"Finished" Nursery
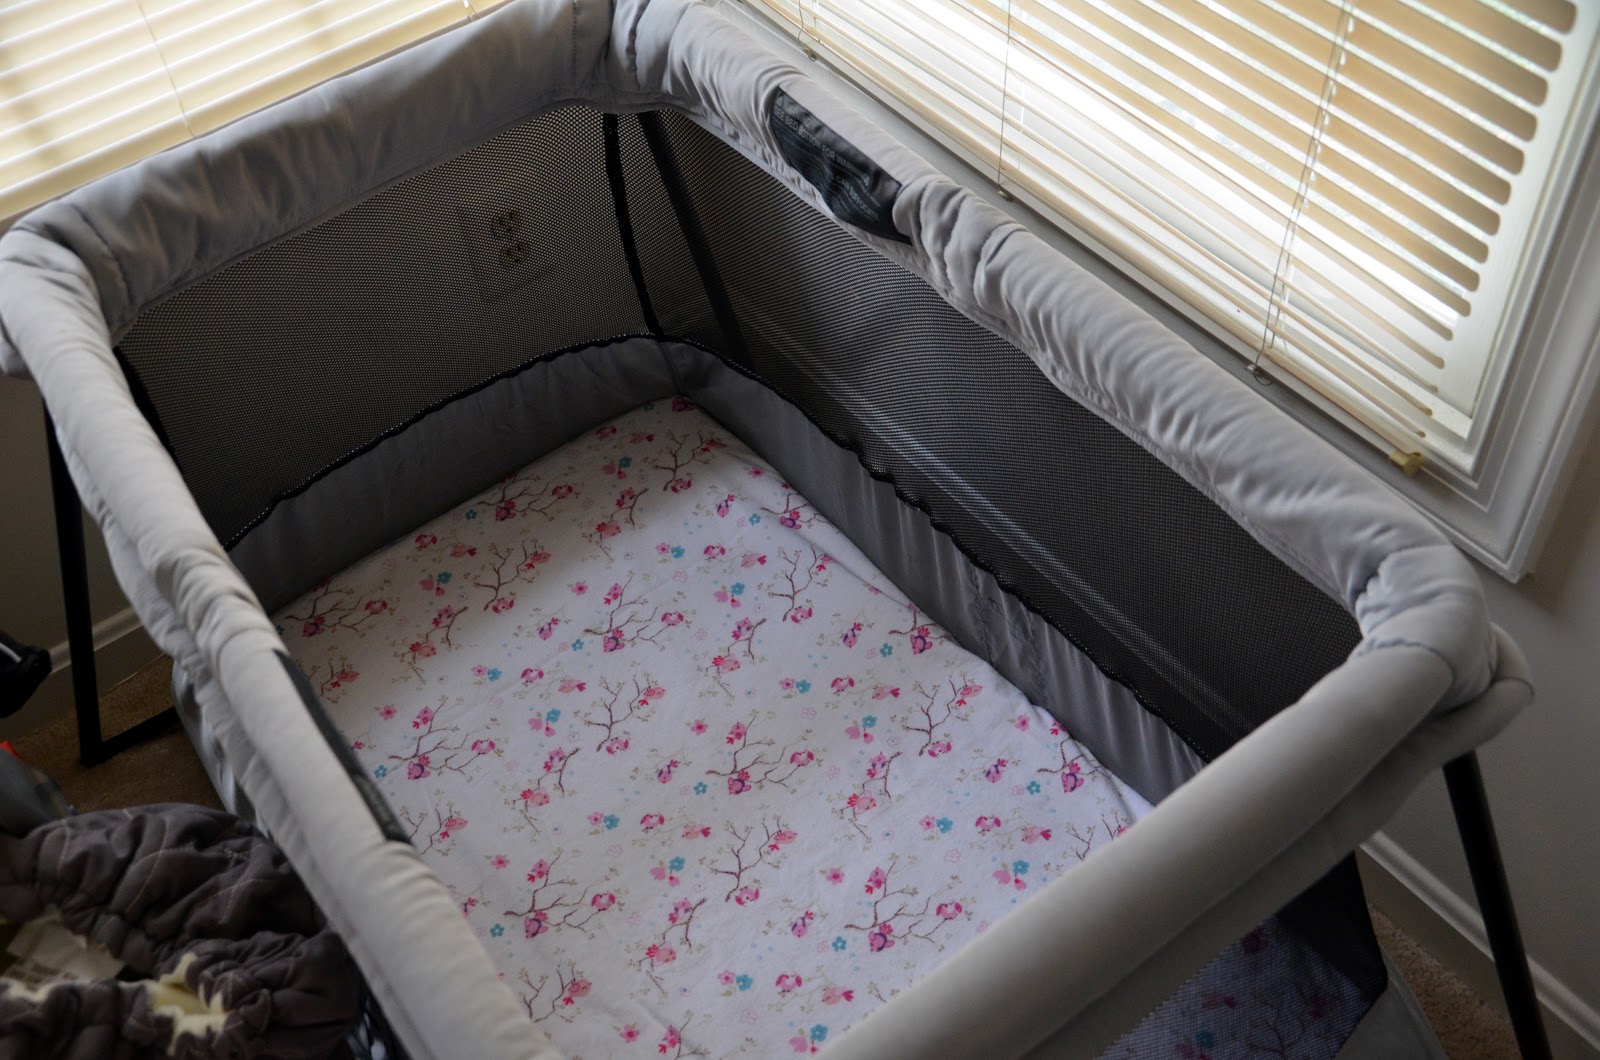
A friend reminded me I never put up any "finished nursery photos" so I real quick took some shots of at least what it looks like now. I still hope to get my talented sister to paint some fairy's for her walls to add some color, but her "thumbprint tree" is hung (still needing more thumbprints of assorted family) and the bumper is up (she still doesn't sleep in here yet though). A few little bird houses on one wall, and her birdhouse nightlight on the other. The mattress won't STAY, but does come in handy the nights she doesn't want to go down easy (or stay down). The rocking chair was made by hand from some lovely maple by dear Hubby, and is SUPER comfy and GORGEOUS. The furniture was my older sisters, and then mine until we finally got "grown up furniture" for our room. And yes, if you've been reading along, the two drawers are still broken ;). And still could be fixed in the same amount of time it's taking me to write this blog. But I have decided that Hubby should be the one to fix it, and I'm not very good at nagging him ;).
-Betsy
-Betsy
Just a tidbit on why I haven't posted
I started to "vent" on facebook, but i really try not to do that. You always get comments you'd rather not, and lots of them. Anyway, this was a fairly typical morning, sadly. And this is what I was about to post.
--------
Another "good" morning. 1 shower, 1 bath, 1 load of laundry. All before noon and all unplanned! Thank you projectile reflux puke and butt blowout. You've given me purpose this morning. At least she slept till 7. Too bad I woke up at 5:45 to feed her and had to wait.
-------
So while I sit here with my smart phone, dictating, and nursing, I'm changing my plans from going to the thrift shop, to doing wash. Washing the puked on sheets, the pooped up pajamas, and the baby that fortunately likes baths now. Wondering when I'll get breakfast, and praying that this stops being "normal" soon. Ugh. Thanks for letting me vent, and no, it's not every day, just often enough that it's not weird or worrying... Says the doc.
P.S. "LA's Totally Awesome" yellow laundry cleaner from the dollar store: awesome. Even at baby poop.
--------
Another "good" morning. 1 shower, 1 bath, 1 load of laundry. All before noon and all unplanned! Thank you projectile reflux puke and butt blowout. You've given me purpose this morning. At least she slept till 7. Too bad I woke up at 5:45 to feed her and had to wait.
-------
So while I sit here with my smart phone, dictating, and nursing, I'm changing my plans from going to the thrift shop, to doing wash. Washing the puked on sheets, the pooped up pajamas, and the baby that fortunately likes baths now. Wondering when I'll get breakfast, and praying that this stops being "normal" soon. Ugh. Thanks for letting me vent, and no, it's not every day, just often enough that it's not weird or worrying... Says the doc.
P.S. "LA's Totally Awesome" yellow laundry cleaner from the dollar store: awesome. Even at baby poop.
January 30, 2012
Yes, I did survive!
So with my little cutie girl being over two months old, I'm realizing that this blog has nearly been abandoned! I do apologize, but I don't really feel bad about it ;). The family has demanded (not really) that I keep our family blog updated with photos of my Little Miss... and I'll be perfectly honest, I haven't gotten too many "fabulous artsy shots". She doesn't (and never has) stayed still... the most wiggly newborn ever - the girl doesn't even SLEEP still!
I do NOT promise to start blogging more, but having the family blog pretty much caught up and her miraculously still napping, I figured I'd let you know that I did, in fact, survive labor - it was pretty awesome actually. Most of my pregnancy involved pain, and a WONDERFUL epidural gave me about 10 hours free of any pain!!
I will continue to kiss these cheeks...
...and maybe, someday, eventually, I'll blog here again (or do something new with the business end of this adventure). On a side note: the website was down for a bit, but is BACK UP!! I'd love to hear your opinions on the photos, which ones you like, even which ones you don't, and what you do and don't like about the site. Please be kind in your criticisms though!
-Betsy
I do NOT promise to start blogging more, but having the family blog pretty much caught up and her miraculously still napping, I figured I'd let you know that I did, in fact, survive labor - it was pretty awesome actually. Most of my pregnancy involved pain, and a WONDERFUL epidural gave me about 10 hours free of any pain!!
I will continue to kiss these cheeks...
...and maybe, someday, eventually, I'll blog here again (or do something new with the business end of this adventure). On a side note: the website was down for a bit, but is BACK UP!! I'd love to hear your opinions on the photos, which ones you like, even which ones you don't, and what you do and don't like about the site. Please be kind in your criticisms though!
-Betsy
November 8, 2011
Munchkin Shoot
So a friend of mine came over with her munchkin and we got to march around the backyard taking some pictures! It's been my first "fall shoot" this year and my first "baby shoot" since high school. I must say, I've learned quite a bit since then! Fortunately MY little munchkin didn't cause me much trouble while I was movin around... then again, HER Munchkin only moves so fast so far!

-Betsy
-Betsy
November 2, 2011
I need a nap. Instead I'm making Pumpkin Muffins.
(P.S. that's a Straight-Out-Of-Camera shot :-P)
Hubby requested Pumpkin Muffins. I do *heart* my pumpkin muffins, with a recipe given to me by my high school crush's mom (at least SHE liked me! lol). I decided since I'm doing all sorts of freezer-ish-stuff, I'd make a BIG batch, and freeze most of them so we can nibble on them to our hearts delight as I get less and less mobile. So I wrote up the "big batch" recipe (aka, using a WHOLE CAN of pumpkin mash, instead of 1/3 of it), went to take a sip of water from my glass... and well... I need a nap.
First: Pumpkin Muffins though, yes? Feel free to join me in one, or both of these efforts.
First, we get all our ingredients out, to make sure we actually HAVE them all. It was a close call for this chica on the Nutmeg - EXACTLY 1 1/2 tsps left in the jar (this must be because I went grocery shopping today). And yes, I use my stove as more counter space when cooking - that's what the flat-top is for, right?!?
Then, we set our oven to preheat to 350*, because if we don't do it now, we'll forget and have to wait longer later.
Now... we measure out our dry ingredients and mix them all together nicely!
Ready to get movin here... cream your margarine. For this "big batch" of 36 muffins, you'll use 2 sticks and 2 tbsp... get it all mushy and light and fluffy, and then slowly add in your brown sugar.
I did this by adding 1/2 a cup at a time. Once all your sugar is in, and it looks all yummy deliciousness, add the pumpkin and eggs. It will then turn gross looking. Like this:
But have no fear, we're adding in the flour mix alternately with the milk, and it'll end up all satiny smooth... just wait. Now... this is the hard part. Add flour mix first, then milk, then flour, then milk, slowly and letting it combine fully before adding more goodies making sure you add flour FIRST AND LAST. Ok, tricks over... now it looks all smooth and delicious again.
Spoon it into muffin tins (with papers) 3/4 full, pop in the oven, and 20 minutes later... DELICIOUSNESS.And there's NO REASON not to pop one out of the pan IMMEDIATELY and eat it piping hot. In fact, do it. THEN take your nap ;)
BIG BATCH RECIPE (Because you'll want it. And so will your neighbors. And family. And dog.)
Makes 3 dozen muffins
Takes 20 minutes at 350*
Prep-Time, maybe 30 minutes?
4 1/2 cups flour
5 1/4 tsp baking powder
1 1/2 tsp baking soda
1 1/2 tsp salt
2 1/4 tsp ginger
1 1/2 tsp nutmeg
3/8 tsp cloves
18 Tbsp Margarine (2 sticks + 2 tbsp)
2 cups Brown Sugar, packed lightly
3 eggs
1 15oz can mashed pumpkin
1 1/2 cups milk
1) Combine first 7 ingredients (dry ingredients sans sugar) in a large bowl
2) Cream margarine
3) Slowly add brown sugar until light and fluffy
4) Add pumpkin and eggs and mix well
5) Add flour mixture alternately with milk slowly, mixing well between additions, beginning and ending with flour mixture.
6) Fill muffin cups 3/4 full
7) Bake in 350* oven for 20 minutes.
8) EAT!!!!
9) Share with neighbors, or freeze extra muffins for defrosting and enjoyment later. **never froze these before, so this is an experiment for me, but seeing as how I've polished off 3 muffins in the writing of this post, that might be why**
**UPDATE**
I packaged these in 12 muffin batches in freezer ziplock bags, placed 2 carefully in our big freezer... and am happy to announce that when removed and left on the counter, they defrost marvelously! So go ahead and freeze them up, knowing it will be LIKE you had fresh-baked muffins after you've finished the first dozen off!
-Betsy
November 1, 2011
Showcase Day!
So I haven't taken any fab pictures lately (and I should, cause the leaves are beautiful around here right now!) but my friend Jes took some SUNDAY. Of ME! :-P So I figured I'd showcase a little bit of her talent here for you (and her!).
Enjoy my preggers-ness and her photography skills!
As a reminder, these photos are copyrighted to JMH Photography and should not be shared or copied without express permission from the artist. If you'd like more information about Jes, e-mail me!
-Betsy
Enjoy my preggers-ness and her photography skills!
As a reminder, these photos are copyrighted to JMH Photography and should not be shared or copied without express permission from the artist. If you'd like more information about Jes, e-mail me!
-Betsy
October 17, 2011
To spoil you all...
OK, you aren't really getting spoiled except in that you'll be disappointed tomorrow when there's no post ;) (maybe... I'm totally on a "blog when I feel like it" streak - this, for example, was not a planned post)
I realized that with my maternity fashions impromptu series (no, I haven't made the last dress or the "hybrid pants" yet...) I haven't updated on all the other goodies I HAVE completed.
For example... the crib is done. I didn't get a 2nd coat of paint on it like I'd hoped, but the fumes got to be too much, and it looked good and so we're finished with it. It looks PRETTY MUCH the same as when I got it instead of a darker shade (oh well... maybe next time), but it's "freshly sealed" and DONE. And built. And in the nursery :-D
The furniture isn't being touched. Baby will not care, and at the moment... mommy doesn't either. So it's now full of freshly washed baby clothes and toys and other baby goodies. Maybe I'll get around to nagging hubby to fix two drawers. We have all the supplies... it'll just take 5 minutes to pull the broken drawer stays off and put new ones on.
The bumper front has been finished!! Due to an illness in the family of the friend that's helping me with the inside, the embroidery isn't (feel free to say a prayer for her and her family in the mean time), but THE BUMPER FRONT IS FINISHED! And it's adorable and I <3 it.
The quilt is done except for a bunch of hand-stitching-on of leaves and the detail embroidery to match the bumper, which my over-fluid-filled-hands are not happy about, so we'll see what happens there.
My port-a-crib sheet I was so anxious and eager to finish is DONE and I'm excited that I can TOTALLY make another from the flannel I have left over! I also got another yard and a half for a third sheet. If I'm feeling adventurous, you might get my "how to" but if I'm lazy... this is the link to the how-to I used (with new dimensions and math and such for my crib pad): http://www.prudentbaby.com/2011/01/crib-sheet-tutorial-part-2.html (except... instead of making casing for the elastic... I just zig-zagged it to the edge of the sheet as tightly as I could. MAYBE I'll try this "casing" thing next time... we'll see. I probably should... it'll hold up much better I imagine.)
The cute "leftover fabric" burp cloths haven't been started yet, but I did get a bunch of pre-fold diapers, so that's been sent to the VERY BOTTOM of the priority list 0:-P
Hubby's scarf was completed, and even BLOCKED!! Except I gave it to him before taking a photo and I haven't seen it since, so you'll just have to believe me when I say it's "just what he wanted" and that it must be at work (and took exactly one skein of yarn).
And the Thank You Cards were made!! (Before I hand-sewed the quilt obviously, but it shouldn't look different post-sewing, so it's good enough)
Yay!! I am no longer neurotic about getting anything else completed, because all the "majorly important projects" that I NEEDED to have finished... are done (or I've just succumbed to the fact that they didn't NEED to be finished). Not to say I still don't have a laundry list of "to-do's"... I'm just not being neurotic about completing them 0:-P
Off to play some more and make some napkins for a friend :-P
-Betsy
I realized that with my maternity fashions impromptu series (no, I haven't made the last dress or the "hybrid pants" yet...) I haven't updated on all the other goodies I HAVE completed.
For example... the crib is done. I didn't get a 2nd coat of paint on it like I'd hoped, but the fumes got to be too much, and it looked good and so we're finished with it. It looks PRETTY MUCH the same as when I got it instead of a darker shade (oh well... maybe next time), but it's "freshly sealed" and DONE. And built. And in the nursery :-D
The furniture isn't being touched. Baby will not care, and at the moment... mommy doesn't either. So it's now full of freshly washed baby clothes and toys and other baby goodies. Maybe I'll get around to nagging hubby to fix two drawers. We have all the supplies... it'll just take 5 minutes to pull the broken drawer stays off and put new ones on.
The bumper front has been finished!! Due to an illness in the family of the friend that's helping me with the inside, the embroidery isn't (feel free to say a prayer for her and her family in the mean time), but THE BUMPER FRONT IS FINISHED! And it's adorable and I <3 it.
The quilt is done except for a bunch of hand-stitching-on of leaves and the detail embroidery to match the bumper, which my over-fluid-filled-hands are not happy about, so we'll see what happens there.
My port-a-crib sheet I was so anxious and eager to finish is DONE and I'm excited that I can TOTALLY make another from the flannel I have left over! I also got another yard and a half for a third sheet. If I'm feeling adventurous, you might get my "how to" but if I'm lazy... this is the link to the how-to I used (with new dimensions and math and such for my crib pad): http://www.prudentbaby.com/2011/01/crib-sheet-tutorial-part-2.html (except... instead of making casing for the elastic... I just zig-zagged it to the edge of the sheet as tightly as I could. MAYBE I'll try this "casing" thing next time... we'll see. I probably should... it'll hold up much better I imagine.)
The cute "leftover fabric" burp cloths haven't been started yet, but I did get a bunch of pre-fold diapers, so that's been sent to the VERY BOTTOM of the priority list 0:-P
Hubby's scarf was completed, and even BLOCKED!! Except I gave it to him before taking a photo and I haven't seen it since, so you'll just have to believe me when I say it's "just what he wanted" and that it must be at work (and took exactly one skein of yarn).
And the Thank You Cards were made!! (Before I hand-sewed the quilt obviously, but it shouldn't look different post-sewing, so it's good enough)
Yay!! I am no longer neurotic about getting anything else completed, because all the "majorly important projects" that I NEEDED to have finished... are done (or I've just succumbed to the fact that they didn't NEED to be finished). Not to say I still don't have a laundry list of "to-do's"... I'm just not being neurotic about completing them 0:-P
Off to play some more and make some napkins for a friend :-P
-Betsy
October 15, 2011
Sometimes, I'm a GENIUS!! - Boppy Cover Tutorial
So tonight (which isn't really tonight, because I've got like, 2 weeks of "how-to's" that will post before this, but work with me) I put together a Boppy cover, and I feel SUPER SMART in how I did it. I know it's not new (in fact, I remember searching for, and finding explanations of how to do this on the internets a while ago, but the links are apparently "evil" so I won't put them here - I probably got some kind of virus visiting it, but whatever) but what I DO think I figured out on my own... was that a standard towel is the PERFECT size (and I'd imagine material!) to make a Boppy cover out of!
A new baby girl entered our family (no, not my baby girl... another one) and I wanted to make her mommy a boppy cover. But I kinda ran out of time to get nice fabric... so I looked at the store and was like "meh. I don't LIKE these :-/. I wanted to MAKE her one!!" and then, the genius button got hit - what if I made it out of a towel?
So I marched myself over to the towel section, picked up a regular pink towel, and marched myself out of the store. I then turned my original Boppy cover inside out, and folded it in half, and traced it onto a piece of freezer paper - my favorite method of pattern making.
I had already decided to use overlapping flaps to keep it "on" instead of a zipper or Velcro or buttons or whatever other methods are out there to keep a Boppy on it's pillow, and that's where I felt so genius - I could use the ends of the towels as the flap bits! (Oh, and the towel is absorbent, so you don't have to worry about the spit-up that will inevitably end up on this nursing pillow.
So I traced out the portions I needed for the "back" onto the edges of a folded towel, and a "whole piece" out of the middle, as well as a 26"x3" strip for the inside of the pillow, and then cut them out.
Now, since it's terry, I felt like it was a good idea to "overlock" the edges - so all the edges got a zig-zag stitch overhanging the edge. It made a lot of terry dust, which leads me to believe that was a smart move.
Once you've got your pieces cut and "serged", take your strip and pin it to the "front" piece, and sew it in place. Then pin it to the bottom back piece, and sew it in place - make sure "right sides are together" for this, because even though it's a towel, there's a tag on there SOMEWHERE.
Here's where I made a boo-boo, but that means you won't. Lay the top back piece down and make sure the edge of the towel is straight across the front. Then lay the bottom back piece down (all right-sides together) so that it LOOKS like a Boppy cover, and pin ALL THE WAY AROUND.
Sew that sucker up from edge to edge, folding the strip in half to start - you'll hit 3 layers of terry where the overlap is, but my machine didn't complain too much, and I definitely wasn't taking it slow. I DID lock stitches over the joints of the pocket... just for extra protection.
Ta-da! Turn that sucker inside out, slide your Boppy in, and pull the top piece over and you're done!
The making of the pattern (which I will hopefully add to this post someday), "serging", "oops"ing of the layout involving seam rippers, AND taking all the photos took me about an hour and a half. I was NOT careful in the serging process... my machine was a humming, but it came out nice! I could have sewn with slightly larger seam allowances, but I was being "safe" there. The pattern allowed for 1/2" seam allowances, and I was just shy, but it fits, and it's good enough for government work! ;)
So go ahead and make a Boppy cover out of an old towel, or a cheap towel, or a fancy towel, or just some fabric. It's much easier than it looks!
-Betsy
A new baby girl entered our family (no, not my baby girl... another one) and I wanted to make her mommy a boppy cover. But I kinda ran out of time to get nice fabric... so I looked at the store and was like "meh. I don't LIKE these :-/. I wanted to MAKE her one!!" and then, the genius button got hit - what if I made it out of a towel?
So I marched myself over to the towel section, picked up a regular pink towel, and marched myself out of the store. I then turned my original Boppy cover inside out, and folded it in half, and traced it onto a piece of freezer paper - my favorite method of pattern making.
I had already decided to use overlapping flaps to keep it "on" instead of a zipper or Velcro or buttons or whatever other methods are out there to keep a Boppy on it's pillow, and that's where I felt so genius - I could use the ends of the towels as the flap bits! (Oh, and the towel is absorbent, so you don't have to worry about the spit-up that will inevitably end up on this nursing pillow.
So I traced out the portions I needed for the "back" onto the edges of a folded towel, and a "whole piece" out of the middle, as well as a 26"x3" strip for the inside of the pillow, and then cut them out.
Now, since it's terry, I felt like it was a good idea to "overlock" the edges - so all the edges got a zig-zag stitch overhanging the edge. It made a lot of terry dust, which leads me to believe that was a smart move.
Once you've got your pieces cut and "serged", take your strip and pin it to the "front" piece, and sew it in place. Then pin it to the bottom back piece, and sew it in place - make sure "right sides are together" for this, because even though it's a towel, there's a tag on there SOMEWHERE.
Here's where I made a boo-boo, but that means you won't. Lay the top back piece down and make sure the edge of the towel is straight across the front. Then lay the bottom back piece down (all right-sides together) so that it LOOKS like a Boppy cover, and pin ALL THE WAY AROUND.
Sew that sucker up from edge to edge, folding the strip in half to start - you'll hit 3 layers of terry where the overlap is, but my machine didn't complain too much, and I definitely wasn't taking it slow. I DID lock stitches over the joints of the pocket... just for extra protection.
Ta-da! Turn that sucker inside out, slide your Boppy in, and pull the top piece over and you're done!
The making of the pattern (which I will hopefully add to this post someday), "serging", "oops"ing of the layout involving seam rippers, AND taking all the photos took me about an hour and a half. I was NOT careful in the serging process... my machine was a humming, but it came out nice! I could have sewn with slightly larger seam allowances, but I was being "safe" there. The pattern allowed for 1/2" seam allowances, and I was just shy, but it fits, and it's good enough for government work! ;)
So go ahead and make a Boppy cover out of an old towel, or a cheap towel, or a fancy towel, or just some fabric. It's much easier than it looks!
-Betsy
Subscribe to:
Posts (Atom)