Showing posts with label Baby. Show all posts

January 31, 2012

"Finished" Nursery

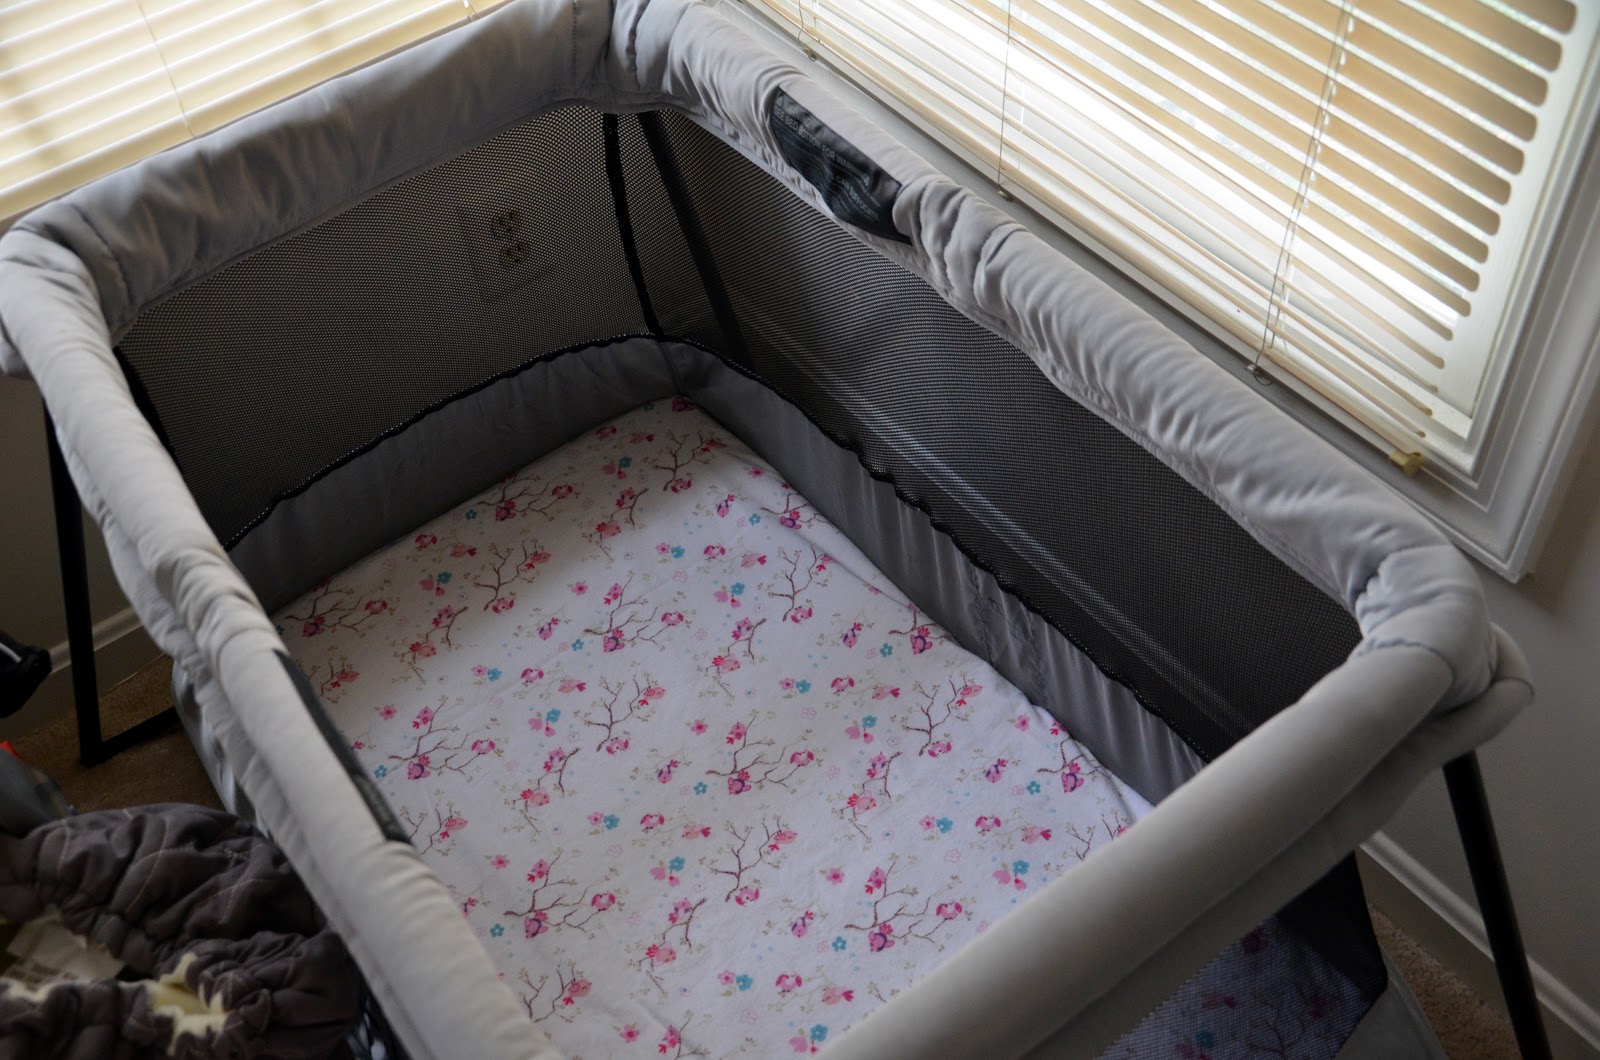
A friend reminded me I never put up any "finished nursery photos" so I real quick took some shots of at least what it looks like now. I still hope to get my talented sister to paint some fairy's for her walls to add some color, but her "thumbprint tree" is hung (still needing more thumbprints of assorted family) and the bumper is up (she still doesn't sleep in here yet though). A few little bird houses on one wall, and her birdhouse nightlight on the other. The mattress won't STAY, but does come in handy the nights she doesn't want to go down easy (or stay down). The rocking chair was made by hand from some lovely maple by dear Hubby, and is SUPER comfy and GORGEOUS. The furniture was my older sisters, and then mine until we finally got "grown up furniture" for our room. And yes, if you've been reading along, the two drawers are still broken ;). And still could be fixed in the same amount of time it's taking me to write this blog. But I have decided that Hubby should be the one to fix it, and I'm not very good at nagging him ;).


-Betsy

November 8, 2011

Munchkin Shoot

So a friend of mine came over with her munchkin and we got to march around the backyard taking some pictures!  It's been my first "fall shoot" this year and my first "baby shoot" since high school. I must say, I've learned quite a bit since then!  Fortunately MY little munchkin didn't cause me much trouble while I was movin around... then again, HER Munchkin only moves so fast so far!


-Betsy

November 1, 2011

Showcase Day!

So I haven't taken any fab pictures lately (and I should, cause the leaves are beautiful around here right now!) but my friend Jes took some SUNDAY. Of ME! :-P So I figured I'd showcase a little bit of her talent here for you (and her!).

Enjoy my preggers-ness and her photography skills!

As a reminder, these photos are copyrighted to JMH Photography and should not be shared or copied without express permission from the artist. If you'd like more information about Jes, e-mail me!


-Betsy

October 17, 2011

To spoil you all...

OK, you aren't really getting spoiled except in that you'll be disappointed tomorrow when there's no post ;) (maybe... I'm totally on a "blog when I feel like it" streak - this, for example, was not a planned post)

I realized that with my maternity fashions impromptu series (no, I haven't made the last dress or the "hybrid pants" yet...) I haven't updated on all the other goodies I HAVE completed.

For example... the crib is done. I didn't get a 2nd coat of paint on it like I'd hoped, but the fumes got to be too much, and it looked good and so we're finished with it. It looks PRETTY MUCH the same as when I got it instead of a darker shade (oh well... maybe next time), but it's "freshly sealed" and DONE. And built. And in the nursery :-D

The furniture isn't being touched. Baby will not care, and at the moment... mommy doesn't either. So it's now full of freshly washed baby clothes and toys and other baby goodies. Maybe I'll get around to nagging hubby to fix two drawers. We have all the supplies... it'll just take 5 minutes to pull the broken drawer stays off and put new ones on.

The bumper front has been finished!! Due to an illness in the family of the friend that's helping me with the inside, the embroidery isn't (feel free to say a prayer for her and her family in the mean time), but THE BUMPER FRONT IS FINISHED! And it's adorable and I <3 it.


The quilt is done except for a bunch of hand-stitching-on of leaves and the detail embroidery to match the bumper, which my over-fluid-filled-hands are not happy about, so we'll see what happens there.


My port-a-crib sheet I was so anxious and eager to finish is DONE and I'm excited that I can TOTALLY make another from the flannel I have left over! I also got another yard and a half for a third sheet. If I'm feeling adventurous, you might get my "how to" but if I'm lazy... this is the link to the how-to I used (with new dimensions and math and such for my crib pad): http://www.prudentbaby.com/2011/01/crib-sheet-tutorial-part-2.html (except... instead of making casing for the elastic... I just zig-zagged it to the edge of the sheet as tightly as I could. MAYBE I'll try this "casing" thing next time... we'll see. I probably should... it'll hold up much better I imagine.)


The cute "leftover fabric" burp cloths haven't been started yet, but I did get a bunch of pre-fold diapers, so that's been sent to the VERY BOTTOM of the priority list 0:-P

Hubby's scarf was completed, and even BLOCKED!! Except I gave it to him before taking a photo and I haven't seen it since, so you'll just have to believe me when I say it's "just what he wanted" and that it must be at work (and took exactly one skein of yarn).

And the Thank You Cards were made!! (Before I hand-sewed the quilt obviously, but it shouldn't look different post-sewing, so it's good enough)

Yay!! I am no longer neurotic about getting anything else completed, because all the "majorly important projects" that I NEEDED to have finished... are done (or I've just succumbed to the fact that they didn't NEED to be finished). Not to say I still don't have a laundry list of "to-do's"... I'm just not being neurotic about completing them 0:-P

Off to play some more and make some napkins for a friend :-P

-Betsy
October 15, 2011

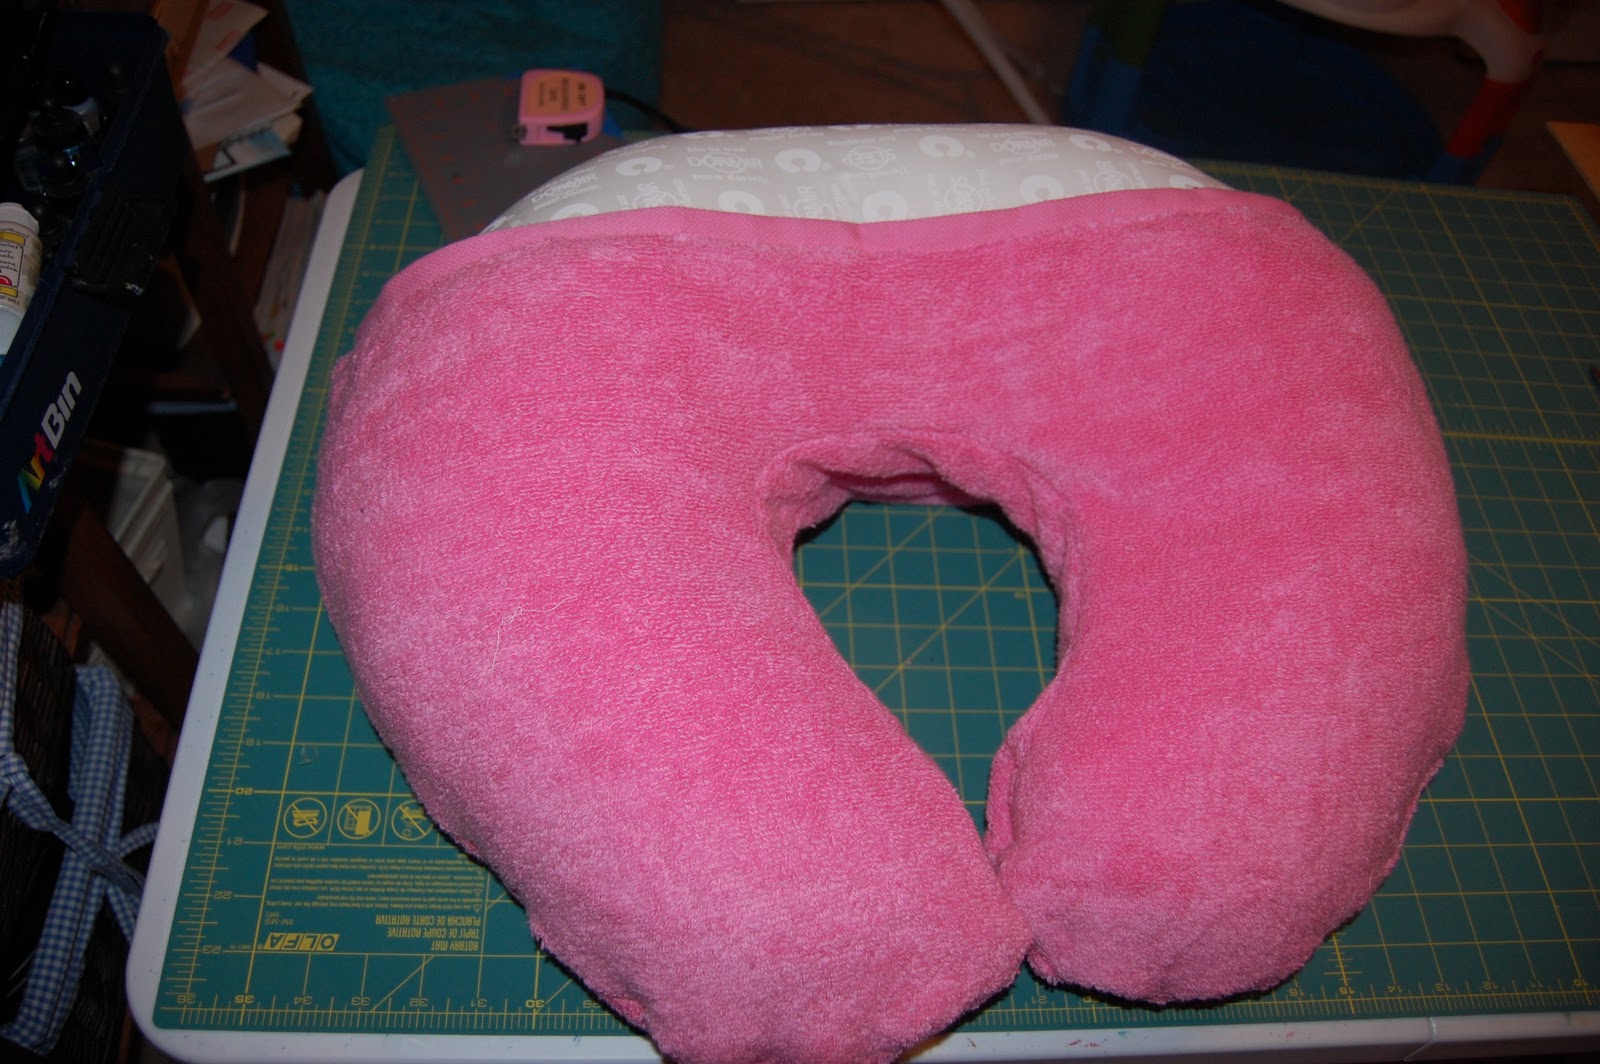
Sometimes, I'm a GENIUS!! - Boppy Cover Tutorial

So tonight (which isn't really tonight, because I've got like, 2 weeks of "how-to's" that will post before this, but work with me) I put together a Boppy cover, and I feel SUPER SMART in how I did it. I know it's not new (in fact, I remember searching for, and finding explanations of how to do this on the internets a while ago, but the links are apparently "evil" so I won't put them here - I probably got some kind of virus visiting it, but whatever) but what I DO think I figured out on my own... was that a standard towel is the PERFECT size (and I'd imagine material!) to make a Boppy cover out of!

A new baby girl entered our family (no, not my baby girl... another one) and I wanted to make her mommy a boppy cover. But I kinda ran out of time to get nice fabric... so I looked at the store and was like "meh. I don't LIKE these :-/. I wanted to MAKE her one!!" and then, the genius button got hit - what if I made it out of a towel?

So I marched myself over to the towel section, picked up a regular pink towel, and marched myself out of the store. I then turned my original Boppy cover inside out, and folded it in half, and traced it onto a piece of freezer paper - my favorite method of pattern making.


I had already decided to use overlapping flaps to keep it "on" instead of a zipper or Velcro or buttons or whatever other methods are out there to keep a Boppy on it's pillow, and that's where I felt so genius - I could use the ends of the towels as the flap bits! (Oh, and the towel is absorbent, so you don't have to worry about the spit-up that will inevitably end up on this nursing pillow.


So I traced  out the portions I needed for the "back" onto the edges of a folded towel, and a "whole piece" out of the middle, as well as a 26"x3" strip for the inside of the pillow, and then cut them out.


Now, since it's terry, I felt like it was a good idea to "overlock" the edges - so all the edges got a zig-zag stitch overhanging the edge. It made a lot of terry dust, which leads me to believe that was a smart move.


Once you've got your pieces cut and "serged", take your strip and pin it to the "front" piece, and sew it in place. Then pin it to the bottom back piece, and sew it in place - make sure "right sides are together" for this, because even though it's a towel, there's a tag on there SOMEWHERE.


Here's where I made a boo-boo, but that means you won't. Lay the top back piece down and make sure the edge of the towel is straight across the front. Then lay the bottom back piece down (all right-sides together) so that it LOOKS like a Boppy cover, and pin ALL THE WAY AROUND.


Sew that sucker up from edge to edge, folding the strip in half to start - you'll hit 3 layers of terry where the overlap is, but my machine didn't complain too much, and I definitely wasn't taking it slow. I DID lock stitches over the joints of the pocket... just for extra protection.


Ta-da! Turn that sucker inside out, slide your Boppy in, and pull the top piece over and you're done!


The making of the pattern (which I will hopefully add to this post someday), "serging", "oops"ing of the layout involving seam rippers, AND taking all the photos took me about an hour and a half. I was NOT careful in the serging process... my machine was a humming, but it came out nice! I could have sewn with slightly larger seam allowances, but I was being "safe" there. The pattern allowed for 1/2" seam allowances, and I was just shy, but it fits, and it's good enough for government work! ;)

So go ahead and make a Boppy cover out of an old towel, or a cheap towel, or a fancy towel, or just some fabric. It's much easier than it looks!

-Betsy

October 14, 2011

Maternity Fashion: Shirred Waist Tank Dress

This was my "really hopeful" dress, that didn't turn out well enough for me to really wear in public, but knowing what I learned from it, it might be useful for some adventurous soul out there!! For now, it's the last of the Maternity Fashion series (I can't believe I've got nearly 2 weeks of posts here!!) although there is one more dress I keep MEANING to try... so maybe I'll get to making it, photographing myself in it, and actually posting it before I'm not pregnant anymore! There's also the "hybrid pant" I should probably make myself too...


Anyway... this was a test run for a maxi-dress that never really happened. It started as a major experiment (that failed too miserably to share) and turned into a fabulous dress to beat around the house with and was SUPER cool this summer!!

Things to note that would have made this a success:
1) No matter how many rows of shirring you use... your fabric will only shrink by half.
2) Make the finished shirred measurement slightly SMALLER than you are around so it fits snugly where you want it to.


This top is almost the same as the top I used for the cowl-neck dress, except that it isn't cowled! It has a high neck in the back, and a scooped neck in the front, with 2 layers of knit for each, sewn together at the neck and arm-holes and turned inside out for finished neck and arm edges (use a stretch stitch for those). To form the shoulders, I turned the back inside out, and pulled the front through until the raw edges met, then sewed straight across with a straight stitch. then I pulled the back right-side-out again, lined up "right sides together" and straight-stitched the side seams of the bodice. You can use a well-fitting tee for the pattern if you have one.


For the skirt, I SHOULD have measured my rib-cage measurement (or the bodice measurement) and multiplied by 1.75, and then made a giant rectangle that width and the length I wanted the skirt (plus an inch for a finished edge, which I do like on this dress) and THEN shirred it. There are plenty of tutorials on-line for shirring fabric, but the basic run-down, is to hand-wind a bobbin with elastic thread, and sew straight lines across your fabric in a few rows (at least 4). When you're done shirring the skirt top, turn the bodice inside out, insert the skirt so all the raw edges are together, and using a stretch stitch, attach them.  It's a good idea here to "overlock" (with a serger, a stitch and cut foot, or just a zig-zag over the edge) that seam so that it lies nicely after washing ;).

Then hem the bottom! You can use a stretch stitch, a double needle, or just straight stitch it, since it's a wide-based skirt.

You can PROBABLY make this dress in cotton vs. a knit too! To make it so you can pull it over your head, add an extra 3"? to the back panel, and before sewing it to the skirt, shirr 6" in rows down the middle - you'll get a shirred detail on the back, and give yourself some "give" room to pull it over your shoulders!

This type of dress can be made for little ones too - and if you want a better pattern, find a tank made of about the same material as you plan on working with and use it to build a bodice!


-Betsy

October 13, 2011

Maternity Fashion: Cowl Neck Maxi Dress

I had a wedding to go to at 14 weeks pregnant. I had no idea how big I was going to be, and seeing as I popped at 12 weeks, I was concerned I might balloon!!  So I made this dress, which fit VERY differently at 14 weeks than it does at nearly 33 weeks! BUT, it does prove that this dress will take me all the way to the end of my pregnancy!


The best part? I've gotten multiple complements on it, my bra doesn't show AT ALL, and it was "fancy" enough to go to a wedding in!  I'm not normally a fan of "cowl necks" but making this one myself, and in the manner that I did it, I like this one. This is a "crud, I need to look presentable and FAST" dress... throw it on, and go!  Hopefully I'll be able to explain the process a little. There was MUCH experimentation in making the top here, and no photos taken 20 weeks ago, so we'll see!


I started with a regular tank. High neck in the back (x2 pieces) and a low neck in the front. The cowl is actually a large trapezoid.I determined the width of the top of the trapezoid by holding the fabric up to my shoulders to form the "drape" I wanted and added 3" to each side for the shoulder straps and seam allowances. The bottom of the trapezoid was matched to the width of the front tank piece so they would align correctly. The height was the distance from my ribcage to the top of my shoulder, which was 13" (I think).

Now, the trick for me being happy with the cowl, was to sew the raw edge of the top of the cowl, to the neckline of the front portion of the tank. That means that the raw edges of the fabric are tucked inside, and can't "pop out" and turn your cowl inside out, OR show more cleavage than intended. The shoulders were... finessed into being, involving a weird kind of fold. I should have taken pictures, and I'm not sure I'd be able to repeat the process!!

Needless to say, once I got the bodice the way I liked it, I attached it to an overly full skirt. Two pieces of fabric, the width of the bolt were sewn into a tube and gathered with a basting stitch to match the "around" of the bodice. With right sides facing together, a wide seam allowance was sewn, and then a narrow one to make a casing for elastic. I had to make this elastic MUCH shorter than anticipated, due to the weight of the skirt! (I was actually worried about the skirt being about 3" too short, but the weight of the fabric just HANGING grew it to just at my ankle! Such a happy accident!  As with most of my knit projects, the bottom of the skirt is unfinished, but it's OK, because knit is wonderful!

I do apologize for this being a very poor "how to" but take confidence in the fact that it was made out of a VERY flowy knit, and with all the folds and gathering bits, I was able to make it without ANY pre-made pattern!  I am by NO MEANS a seamstress - the only sewing instruction I've ever received was from my mom at age 7, a little tip here and there from Grandma... and 7th grade home-ec!  It might look a little "homemade" but it's still totally acceptable for public wear! It's been a church staple since that wedding, and I've even gotten compliments on it!

Don't be afraid of knit - just remember to use a stretch stitch where it needs to stretch!

-Betsy

October 12, 2011

Maternity Fashions: Kimono Tunic

Yesterday, I posted about turning a Kimono Tee Pattern from BurdaStyle into a ruched tee, and today, I'll explain how I turned that same pattern into this tunic! (This is NOT a pattern, or really a tutorial. You'll need your own set of sewing skills and experimentation gusto to make this top!)


(yes, I normally wear stretch pants with this top, 
but I was being lazy and "just getting the photos taken." 
That's as little "leg" as I could manage for you!)

This top is a little more complicated than yesterday's, but JUST as comfy!!  There's two ways to make this, and I'll explain the way I did it... and then the way I'd do it if I was to do it again. 

Using the same $2.00/yd knit from the value bin at Hancock Fabrics, it's actually THREE pieces of fabric... the bodice, the front of the body and the back of the body. You'll also need a length of 1/4" elastic that fits snugly around your bust line.

The bodice is made just like the Kimono Tee's, but it stops about 1" below the "arms."

The bodice has identical front and back pieces, that start at the same width as the bottom of the bodice, and move out in an a-line to your final wanted width. You'll want to make sure you have PLENTY of room for a growing belly and tushy (Ideally 1.5 times your widest measurement) The length is measured from your bust-line to where you'd like it to hit your legs, plus 1 inch.

Sew the a-line pieces into a tube, and turn it inside out. Then sew the tube to the bodice (right sides facing) with a 3/4" seam allowance all the way around, and then again at 1/4" seam allowance from the edge but NOT all the way around... leave about 2" unsewn. You've just sewn a casing for your elastic!!  

Now, when putting elastic in, make sure you "try on" the elastic so that it fits you snugly, but not uncomfortably, or too loose. Thread it through the "mini tube" of fabric and stitch the sides together, and then finish stitching the casing closed. Essentially, you are done now, but I did a few little "extras."  

The first, was to make sure the elastic gathered more fabric in the tummy area than in the back, so I tacked a few stitches through the casing so there was more fabric in the front than the back and the elastic wouldn't spin.

The second was probably more "important" - adding some fabric flowers to the front. Not only did this help me figure out which was front and back (since I tacked the fabric, it now HAD a front and back), but it makes it look "finished". One was a twisted flower - a thin strip of the knit fabric twisted and stitched as I went until it was about an inch and a half wide. And a "quarter fold" flower. The same knit cut with pinking shears in VERY not-circular circles. The wonkier, the better actually!  4 large circles, and 4 small circles were cut, and then folded in quarters so there were a bunch of layers, and then arranged in a circle and sewn together. To give it some dimension, when stitching it to the neck of the tunic, I put a stitch through the top layers of the smaller flowers. 

Play, have fun! Try your own version of flowers, or different fabrics!

Now, if you haven't already tried making something out of your fabric, and are not piecing this together from what you have left... when you cut out your bodice, just extend it as long as you'd like it to be +1" and put a HEAVY a-line in below the arms. Then fold so that "right sides face" at the bust line, and sew at 1/2" seam allowance to make a pocket for your elastic, leaving a 2" gap. Then thread your elastic and finish sewing up your casing. Ta-da!! Much easier. :)
-Betsy

October 11, 2011

Maternity Fashions: "Ruched" Shirt


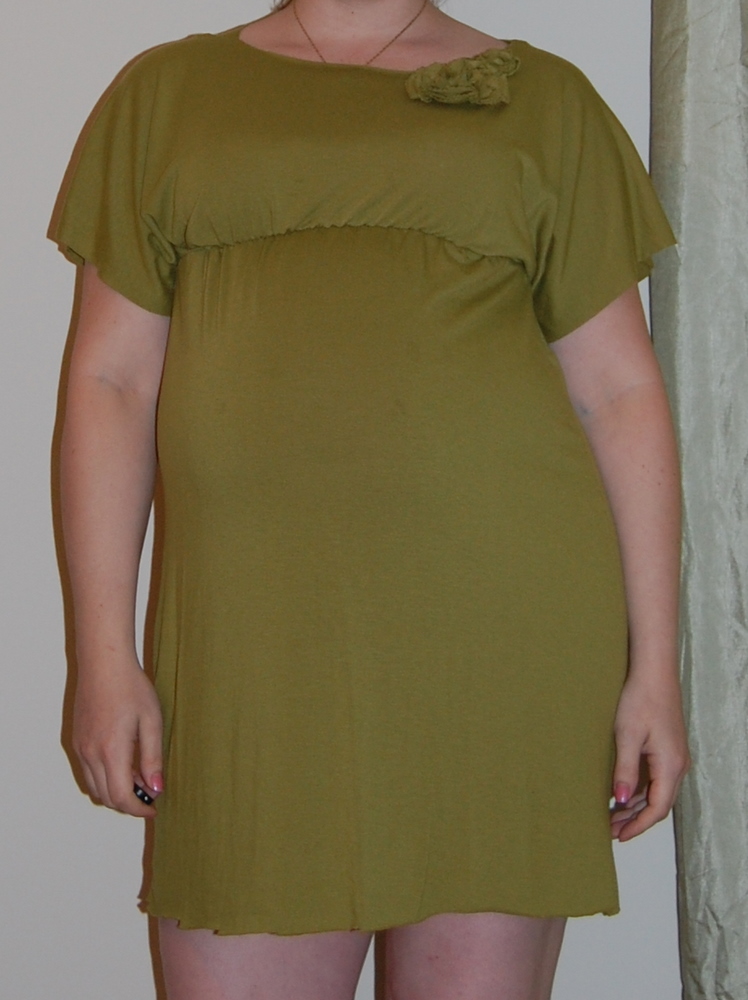
This shirt is actually a mistake. A SUPER COMFORTABLE mistake, but a mistake never the less!  I found this pattern for a "Kimono Tee" on BurdaStyle.com and decided to try and make a tunic out of it by lengthening it. Well, I didn't account for the belly or hips when I did, so I ended up with this super-tight, really long shirt. Not ideal. SO, I figured I'd try "ruching" the front to make it fit over the upcoming belly. I used a basting stitch on the front half of the fabric starting 4" from the edge of the sleeves to the edge, and gathered it up, well... until it looked nice and hit a good spot on my hips really. Then I pinned it to the back side and sewed the two together (with the back remaining flat). I then trimmed off the back in a nice curve (to help cover the bum). Since it was made of knit, I didn't finish ANY of the edges. And this fabulously draping green fabric was in the Value Bin at $2.00/yard!! So the shirt cost me about... $3.00. I've gotten compliments on this shirt out in town too! And surprised a few people saying that I MADE it!. Tomorrow I'll tell you about successfully modifying the Kimono pattern into a tunic!

Just remember: when you go to sew clothes, or anything really... don't be afraid!! You never know what you'll end up with, and there's USUALLY a way you can fix it - and make a statement while doing so!

-Betsy

October 8, 2011

Maternity Fashions: Refashioning Pants for Baby Belly: NO panel?!? But a draw-string!

After trying "Full Panel Jeans" and "Partial Panel Capri's" I was still looking for the "perfect waistband" for this cranky pregnant belly, and decided to make a pair of Bermuda shorts that felt like my PJ's.


The key? A draw-string. The thing is... if you just throw a draw string on your pants when your pregnant... you end up with... a pouch. That... isn't attractive. SO, as with the other types of maternity pants: we're cutting out where the belly goes here too. BUT, this time... when you make your cut, make it 1/2"-1" SMALLER than where you THINK it should be, because we're going to turn the front edge of those pants into a casing for that drawstring. If that means you can't cut out the whole zipper - then cut the zipper itself out, and sew up what's remaining of the fly.

With these pants, you shouldn't use pants that are too-small in any way. A little bigger than you need is best. These pants came from the thrift shop, and have been worn a BUNCH - they are my "go-to" pant. Although, if I was going to make another pair at this point, I'd make a hybrid of this and the partial-panel-pant... which I'll explain at the end (since I haven't actually made one yet).

So after we've cut our belly-section out, we simply fold over the edge semi-circle hole as much as you allowed for before. Make sure that it's 1/4" MORE than the width of your elastic. I used 1/4" elastic, so I had a 1/2" casing. You won't go all the way around the pant, just around the belly opening. Now's where we hit the "gritty" portion of my maternity refashions. The little details I DIDN'T worry about, since no one was supposed to see it anyway!

With a pair of scissors, cut two small holes in the outside of the casing in the front - very tiny... just enough to fit a safety pin in. You'll be using those holes for your drawstring (and to thread your elastic). First: the elastic. With a piece of elastic that fits snugly around your body and under your belly without being uncomfortable thread the elastic through the front casing, into the waistband around the back, and back through to the same hole you started in. (I tend to cut it longer than needed, tack it with a safety pin, and wear the pants for a day, to adjust to make sure it's the right length.)  In these pants, I had to snip a little holes on the INSIDE of either side to bypass the side seam. No worries if you need to do this... who's really looking at the inside of your waistband anyway?!?

Once you've got your elastic threaded through and the right length, you'll tack the two ends together and tuck them inside that little hole you started with. Then, you'll take a shoelace (I used a ribbon, but it would have worked better with a bias tape or something with a little flex to it.) and thread it around so you can "tighten it up" as needed - just like your PJ's.  And ta-da! You have a pair of pants that you can tie up against the un-sensitive parts! The only downside? You don't get that "bare skin protection" of a panel - so this is a good style for long tee shirts, tunics, or days you REALLY don't care. As your belly gets bigger, you'll have to be more careful. Fortunately? I needed a brace for the 2nd half of the pregnancy, and it "covered" me - but the brace was visible. This is why if I made these again, I'd make a 'hybrid' version.


To make a hybrid version, I would follow basically all the same instructions as shown here, but also sew ina panel when I sew the casing in the front: purely as a "skin cover-up". In that case, you'd pin back your casing edge, and lay a piece of knit large enough to cover the opening (and folded for a nice edge around the waist) underneath before sewing it. You could totally cut the "extra" off around the seam allowance after sewing too, so feel free to use a rectangle. If I make another pair of pants, it'll definitely be that way!


-Betsy