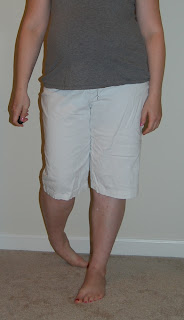
After trying "Full Panel Jeans" and "Partial Panel Capri's" I was still looking for the "perfect waistband" for this cranky pregnant belly, and decided to make a pair of Bermuda shorts that felt like my PJ's.
The key? A draw-string. The thing is... if you just throw a draw string on your pants when your pregnant... you end up with... a pouch. That... isn't attractive. SO, as with the other types of maternity pants: we're cutting out where the belly goes here too. BUT, this time... when you make your cut, make it 1/2"-1" SMALLER than where you THINK it should be, because we're going to turn the front edge of those pants into a casing for that drawstring. If that means you can't cut out the whole zipper - then cut the zipper itself out, and sew up what's remaining of the fly.
With these pants, you shouldn't use pants that are too-small in any way. A little bigger than you need is best. These pants came from the thrift shop, and have been worn a BUNCH - they are my "go-to" pant. Although, if I was going to make another pair at this point, I'd make a hybrid of this and the partial-panel-pant... which I'll explain at the end (since I haven't actually made one yet).
So after we've cut our belly-section out, we simply fold over the edge semi-circle hole as much as you allowed for before. Make sure that it's 1/4" MORE than the width of your elastic. I used 1/4" elastic, so I had a 1/2" casing. You won't go all the way around the pant, just around the belly opening. Now's where we hit the "gritty" portion of my maternity refashions. The little details I DIDN'T worry about, since no one was supposed to see it anyway!
With a pair of scissors, cut two small holes in the outside of the casing in the front - very tiny... just enough to fit a safety pin in. You'll be using those holes for your drawstring (and to thread your elastic). First: the elastic. With a piece of elastic that fits snugly around your body and under your belly without being uncomfortable thread the elastic through the front casing, into the waistband around the back, and back through to the same hole you started in. (I tend to cut it longer than needed, tack it with a safety pin, and wear the pants for a day, to adjust to make sure it's the right length.) In these pants, I had to snip a little holes on the INSIDE of either side to bypass the side seam. No worries if you need to do this... who's really looking at the inside of your waistband anyway?!?
Once you've got your elastic threaded through and the right length, you'll tack the two ends together and tuck them inside that little hole you started with. Then, you'll take a shoelace (I used a ribbon, but it would have worked better with a bias tape or something with a little flex to it.) and thread it around so you can "tighten it up" as needed - just like your PJ's. And ta-da! You have a pair of pants that you can tie up against the un-sensitive parts! The only downside? You don't get that "bare skin protection" of a panel - so this is a good style for long tee shirts, tunics, or days you REALLY don't care. As your belly gets bigger, you'll have to be more careful. Fortunately? I needed a brace for the 2nd half of the pregnancy, and it "covered" me - but the brace was visible. This is why if I made these again, I'd make a 'hybrid' version.
To make a hybrid version, I would follow basically all the same instructions as shown here, but also sew ina panel when I sew the casing in the front: purely as a "skin cover-up". In that case, you'd pin back your casing edge, and lay a piece of knit large enough to cover the opening (and folded for a nice edge around the waist) underneath before sewing it. You could totally cut the "extra" off around the seam allowance after sewing too, so feel free to use a rectangle. If I make another pair of pants, it'll definitely be that way!
-Betsy


No comments:
Post a Comment